
Surround Sound Test – Free Online 5.1 & 7.1 Speaker Channel Check
You spent hours setting up your home theater. Every wire is connected. Every speaker is positioned. You hit play on your favorite movie — and something feels off. One speaker sounds weak. Another seems to come from the wrong direction.
This free surround sound test solves that problem in under two minutes. Check every channel, verify every speaker position, and confirm your entire audio setup is working exactly as it should — directly in your browser. No downloads, no sign-ups, zero cost.
What Is a Speaker Surround Sound Test?
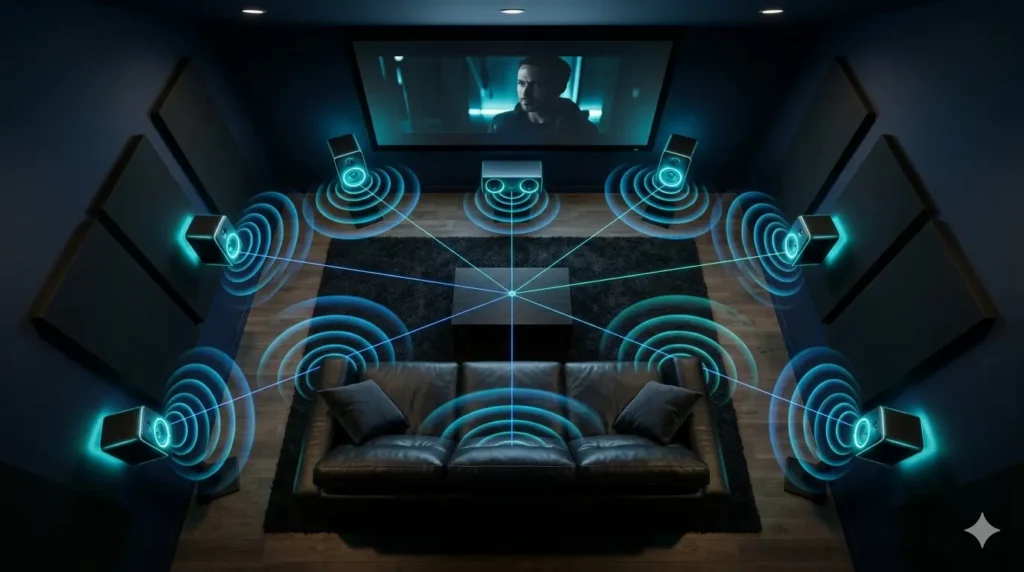
A surround sound test sends individual audio signals through each speaker channel in your system — one at a time. You listen to confirm the sound is coming from the correct physical direction. It is the fastest and most reliable way to verify that your entire multi-channel audio configuration is set up correctly.
Think of it as a 2-minute health check for your entire sound system. this sorround sound test catches problems that would otherwise take hours of guesswork to identify — wrong channel assignments, weak speakers, misconfigured subwoofers, and incorrect placement.
Mono vs Stereo vs Surround Sound – What Is the Difference?
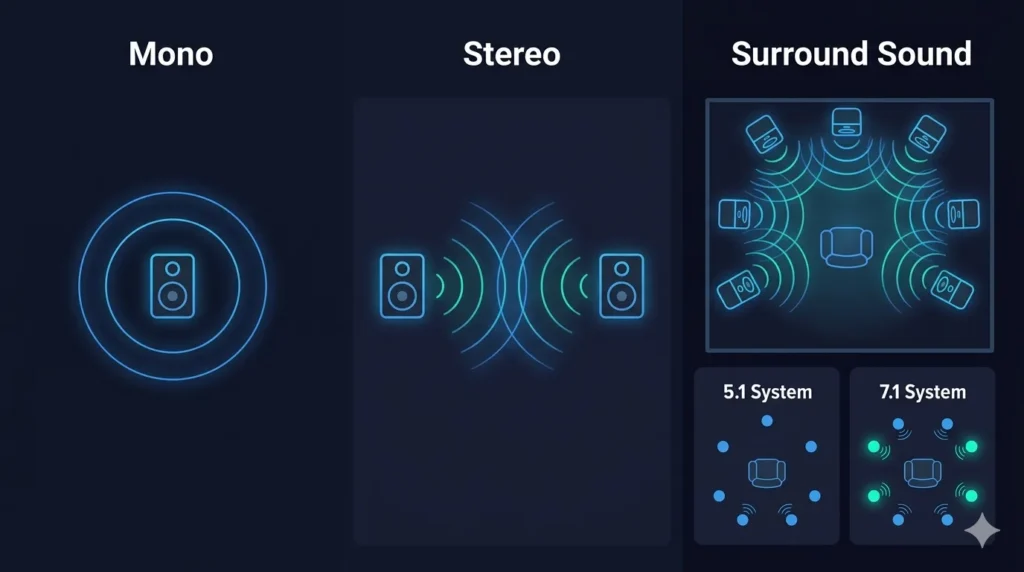
Understanding these three configurations helps you get the most accurate results from your surround sound test.. Audio setups come in three main configurations — and each one delivers a completely different listening experience.
A mono system uses a single channel. All audio comes from one source with no sense of space or direction. Stereo takes it further by using two channels — left and right — creating basic width but still limited depth. Not sure if your stereo channels are working correctly? Run a quick stereo sound test before moving to surround.Surround sound places multiple speakers around the listener in all directions, building a three-dimensional audio environment that feels natural and immersive.
What Is a 5.1 Surround Sound System?
A 5.1 configuration uses six channels — front left, front right, center, rear left, rear right, and a dedicated subwoofer for low-frequency bass. The center channel anchors dialogue and vocals directly in front of you. The rear pair creates depth and atmosphere behind your listening position. It is the most widely used surround sound setup for home theaters, gaming rooms, and living spaces worldwide.
What Is a 7.1 Surround Sound System?
A 7.1 system expands the standard 5.1 layout by adding two extra side channels — side left and side right — bringing the total to eight individual audio channels. This additional layer of side coverage delivers more precise sound positioning and greater immersion. It works best in larger rooms where the extra side speakers have enough physical space to produce a convincing directional effect.
5.1 vs 7.1 – Which One Is Right for You?
For most rooms and most listeners, a well-calibrated 5.1 setup sounds just as impressive as a 7.1 system. The extra side channels in 7.1 only make a meaningful difference in larger dedicated listening rooms where side speaker placement is optimal. If you are setting up in a standard-sized living room or bedroom, a properly tested and calibrated 5.1 system delivers outstanding results without the added complexity.
How to Use the Speaker Surround Test Tool
No technical background needed here to use sorround sound test. The process is straightforward — follow these five steps and your full system will be verified in minutes.
Prepare Your Audio Setup
Make sure every speaker is physically connected to your receiver or amplifier. Power everything on and set your audio output to surround sound or multi-channel mode in your device settings. If you are testing on a phone or tablet, connect headphones for the most accurate directional results.
Choose Your System Type (5.1 or 7.1)
Select your configuration at the top of the tool. If you are using headphones without a physical speaker system, choose the spatial audio or headphone mode. Not sure which system you have? Check your receiver manual or count the number of speaker outputs on your amplifier.
Test Each Speaker Channel One by One
Click or tap each individual speaker button. Listen carefully — the sound should come from the exact physical location of that speaker relative to where you are sitting. If the audio arrives from the wrong direction, your channel mapping or speaker positioning needs adjustment.
Run the Subwoofer Bass Test
Tap the subwoofer or LFE channel button. A correctly working subwoofer produces a deep, low rumble you can feel physically — not just hear. No response at all means the LFE channel may be disabled in your receiver settings, or the subwoofer cable needs checking.
Use Auto Sweep to Check All Channels at Once
Activate the Auto Sweep function to automatically cycle through every speaker channel in sequence. This gives you a rapid overview of your entire system and instantly reveals any channel that sounds noticeably weaker or misdirected compared to the others.
What to Listen for During Your Surround Sound Check
Pressing the buttons is only half the work. Knowing what a correct result sounds and feels like is what separates a useful test from a wasted one.
Left and Right Channel Separation
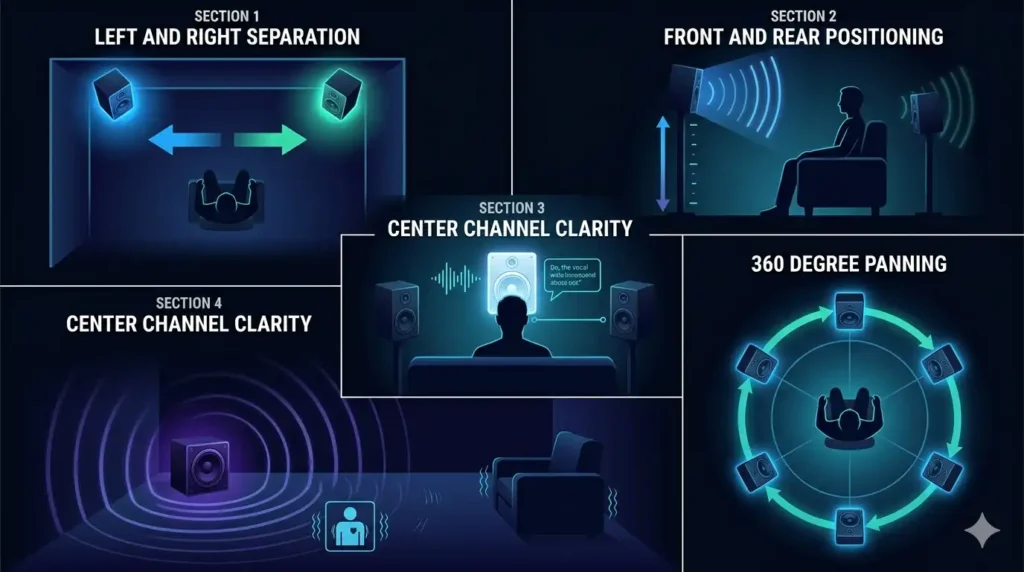
Left and right should sound completely distinct and clearly separated. If the left channel appears to come from the right side — or vice versa — your speakers are either physically swapped or connected to the wrong receiver outputs.
Front and Rear Speaker Positioning
Front speakers should project sound that feels direct, slightly elevated, and coming from ahead of you. Rear speakers should create a clear sense of audio arriving from behind your head. If front and rear feel similar in direction, your rear speakers are likely placed too close to the front or connected incorrectly.
Center Channel Clarity
The center channel carries dialogue and lead vocals. It should feel precisely anchored between your front left and right speakers — directly ahead of your seating position. Any deviation from center suggests the speaker is angled incorrectly or the channel needs reconfiguration in your receiver.
Subwoofer Bass Response
Deep bass from a correctly working subwoofer is a physical sensation as much as an audible one. You should feel it in your chest and seat at moderate volume. Weak or barely audible bass usually means the crossover frequency is set too low or the LFE channel volume in your receiver needs adjustment.
Smooth 360 Degree Audio Panning
During the circular pan test, audio should rotate smoothly around your listening position without any sudden gaps or volume drops. A noticeable dip during the rotation points directly to a speaker channel that is underperforming or positioned too far from its optimal angle.
Why Run a Surround Sound System Test?
A surround sound test system is not just for new installations. Regular verification ensures your setup delivers the performance it was designed for — every single time you use it.
Gaming – Gain a Directional Audio Advantage
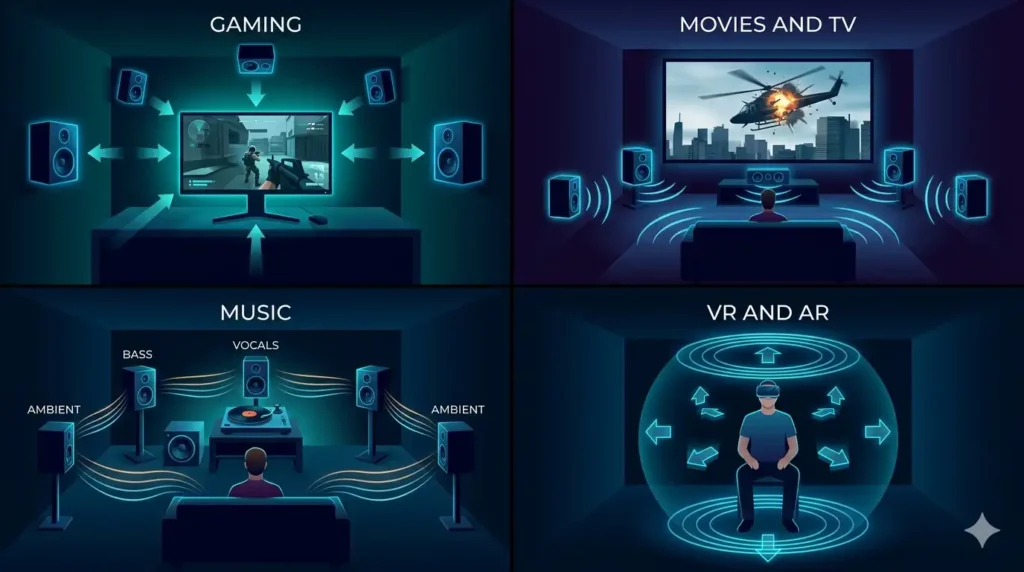
In competitive titles like Call of Duty, Valorant, or CS2, spatial audio is not just atmosphere — it is tactical information. Pinpointing the exact direction of approaching footsteps, distant gunshots, or vehicle engine noise gives you a measurable reaction advantage. A verified surround sound configuration ensures none of that directional data gets lost in a misconfigured channel.
Movies and TV – Recreate the Cinema Experience
Dolby Atmos and DTS content places specific sounds in precise positions across your speaker array. A single misconfigured channel breaks that spatial design and flattens the experience. Running this 5.1 surround sound test before a movie confirms every channel is active and positioned correctly — so the audio delivers the full cinematic effect the director intended.
Music – Hear Every Instrument in Its True Position
High-fidelity surround sound music mixes place bass in the subwoofer, lead vocals in the center, and ambient textures in the rear channels. A properly calibrated setup means you hear the recording the way the engineer intended. An unchecked system collapses that spatial mix into a muddled, flat presentation.
VR and AR – Maintain Full Audio Immersion
In virtual reality, convincing audio placement is what makes digital environments feel physically real. A sound appearing from the wrong direction — or a channel that drops out entirely — immediately breaks the sense of presence. Verifying your audio configuration before a VR session keeps the experience seamless and believable.
Surround Sound Speaker Placement Guide
Even a perfectly calibrated system sounds poor when speakers are positioned incorrectly. Placement directly affects how accurate the sorround sound test results will be.
5.1 Speaker Placement
Position your front left and right speakers at roughly 30 degrees on either side of your display, angled inward toward your listening chair. The center speaker goes directly below or above your screen, firing straight at your seat. Rear speakers should be placed 90 to 110 degrees to the side and slightly behind your listening position, mounted at ear height or slightly above.
7.1 Speaker Placement
In a 7.1 layout, the side speakers sit directly to your left and right at 90 degrees — exactly level with your ears. The rear speakers shift further back to 135 to 150 degrees behind your position. This wider rear spread is what produces the more precise spatial layering that makes 7.1 worth the extra investment in larger rooms.
Subwoofer Placement Tips
Subwoofers are less directionally sensitive than other speakers, which gives you more flexibility in positioning. The most common placement is near the front of the room, close to either front speaker. For deeper, more even bass distribution, try the “subwoofer crawl” — place the sub at your listening position, play bass-heavy content, and walk around the room until you find the spot where the bass sounds fullest and most even. That spot is your optimal subwoofer position.
Home Theater Listening Position
Your seating position matters as much as your speaker placement. Sit too close to a rear wall and bass frequencies build up unnaturally. The ideal listening position is roughly one-third of the way from the back wall — far enough from the wall to avoid bass buildup, close enough to the front to maintain dialogue clarity from the center channel.
How to Fix Common Surround Sound Problems
If something sounds wrong during your surround sound test, here is how to diagnose and fix the most frequent issues without calling a technician.
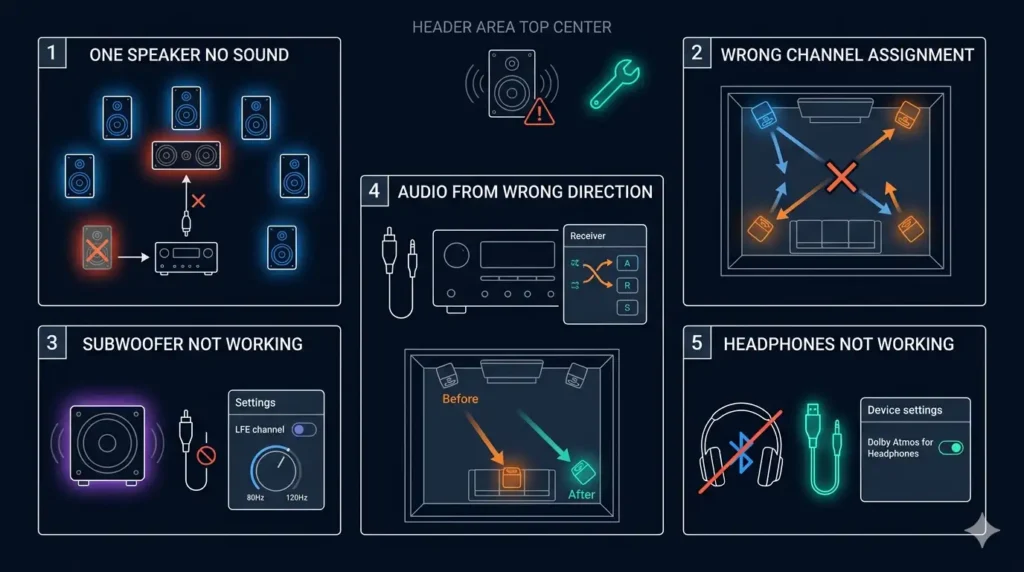
One Speaker Producing No Sound
Check the physical cable connection at both ends — the speaker terminal and the receiver output. Swap the cable with a known working speaker to determine whether the cable or the speaker is at fault. If the speaker works on a different channel but not its assigned one, the receiver channel may have failed and needs professional inspection.
Wrong Channel Assignment
If sound emerges from the wrong speaker during the directional sound test, your channel mapping is incorrect. Navigate to your receiver’s speaker configuration menu and manually reassign each channel to match its physical speaker location. This is one of the most common setup errors and one of the easiest to fix.
Subwoofer Not Working
Confirm the subwoofer is powered on and the power cable is secure. Check that the RCA or LFE cable connecting it to the receiver is firmly seated at both ends. In your receiver settings, verify that the LFE channel is enabled and that your crossover frequency sits between 80Hz and 120Hz for most room sizes.
Audio Coming from Wrong Direction
This almost always indicates physical speaker misplacement rather than a configuration error. Use the individual channel buttons on this tool to identify exactly which speaker is misdirected, then physically reposition it to match the correct angle for your system type.
Surround Sound Not Working on Headphones
Ensure your headphones are connected via a wired connection rather than Bluetooth — Bluetooth often strips spatial audio processing during transmission. Enable Dolby Atmos for Headphones or DTS Headphone:X in your device audio settings. Select headphone or spatial audio mode in this tool for the most accurate channel verification.
Surround Sound Test for Headphones
You do not need a room full of speakers to experience multi-channel audio. Modern headphones can convincingly simulate a full surround sound environment through advanced processing technology.
What Is HRTF and How Does It Work?
HRTF stands for Head-Related Transfer Function. It is a digital model that replicates how real-world sounds interact with the physical shape of your ears, head, and shoulders before reaching your eardrums. When this model is applied to headphone audio, your brain interprets the processed signal as coming from specific positions in three-dimensional space — front, rear, side, above — even though the audio physically originates from two small drivers inside the headphones.
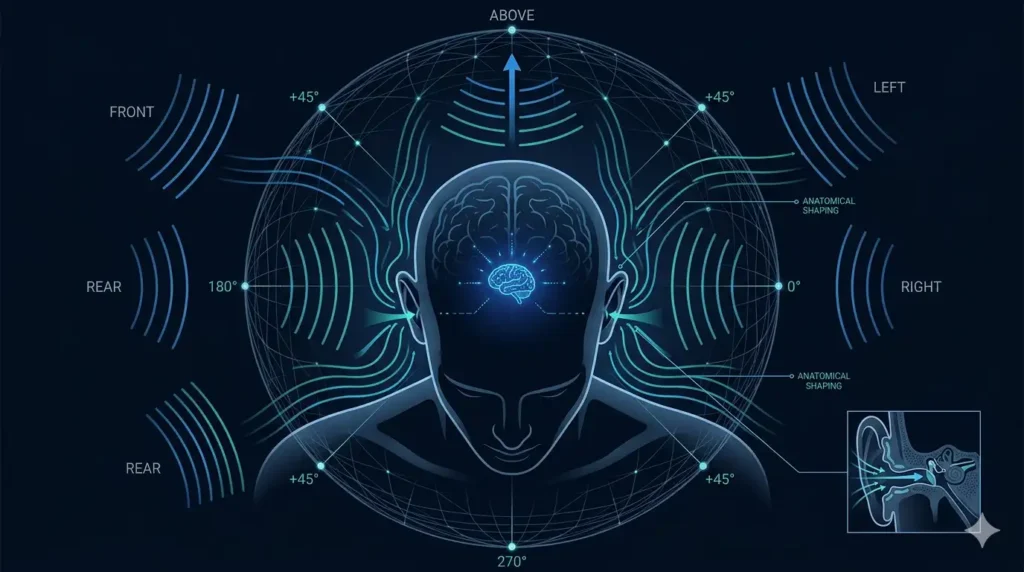
How to Test Spatial Audio on Headphones
Put your headphones on and select the spatial audio mode in the tool. Press each directional button and focus on where the sound appears to originate. With quality headphones and properly implemented HRTF, front audio should feel forward and slightly elevated, rear audio should feel like it originates behind your head, and left and right channels should be clearly distinct. The 360-degree pan demonstrates smooth, continuous movement of sound around your head.
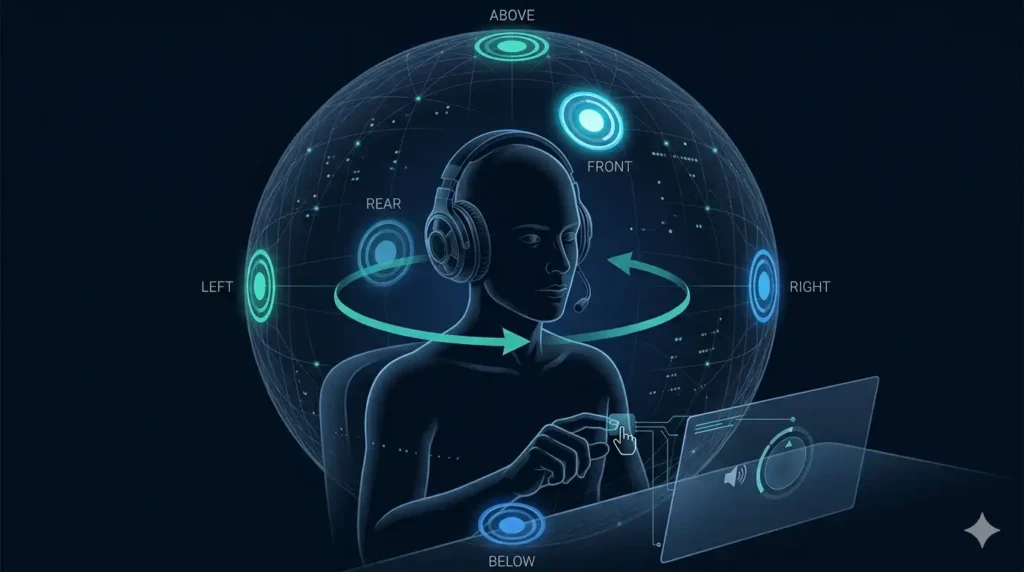
Dolby Atmos and DTS Headphone Support
If your device supports Dolby Atmos for Headphones or DTS Headphone:X, enable it before running the test for a more immersive spatial audio result. These technologies apply advanced HRTF processing specifically optimized for headphone listening — producing more convincing height and depth cues than the generic browser HRTF model alone.
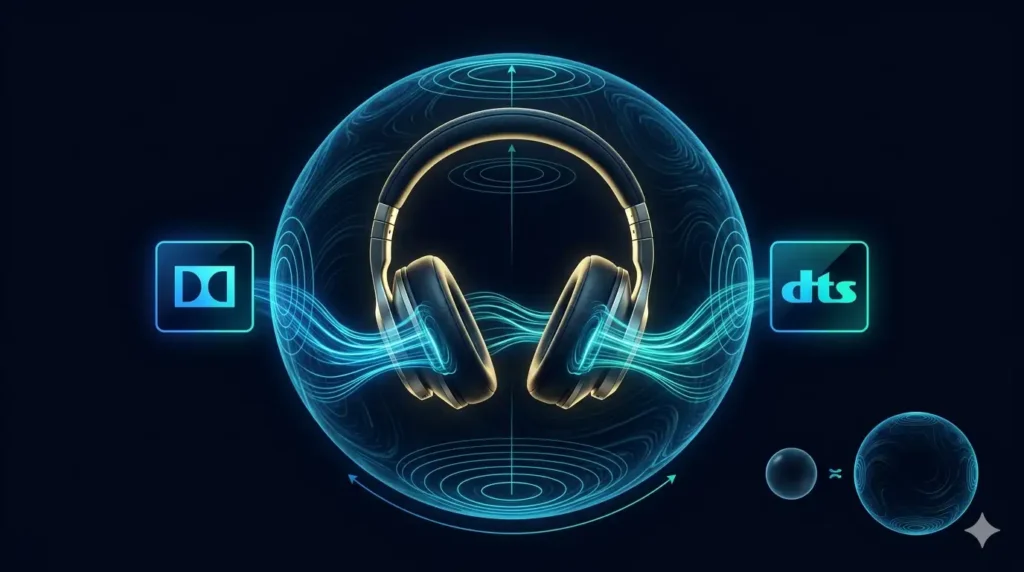
Limitations of Browser Based Surround Sound Testing
Sorround sound test runs entirely within your browser using the Web Audio API — no downloads, no installations, complete privacy. However, a few limitations are worth understanding before interpreting your results.
The HRTF model applied in browser-based testing is a generic mathematical approximation — not a personalized measurement matched to your individual ear shape and head dimensions. Professional spatial audio calibration systems use custom HRTF profiles measured in anechoic chambers, which produce more precise directional accuracy for each individual listener.
Different browsers implement the Web Audio API with subtle variations. Chrome and Edge generally deliver the most consistent spatial audio results. Firefox and Safari may produce slightly different directional cues for the same test signal. For desktop speaker testing, room acoustics affect results — hard surfaces and parallel walls introduce reflections that alter how directional sounds are perceived from fixed speaker positions.
When Should You Run a Surround Sound Check?
- When configuring a brand-new home theater or gaming room
- After physically moving speakers or rearranging furniture
- Following the installation of a new receiver, amplifier, or soundbar
- After a firmware or software update on your audio equipment
- Before an important gaming session, movie screening, or listening event
- As a routine maintenance check every two to three months
A complete directional sound test takes less than two minutes and ensures your audio system consistently delivers the performance your equipment is capable of.
Tips to Get the Most Accurate Test Results
- Sit in your normal listening position throughout the entire test
- Set your system volume to a moderate but clearly audible level before starting
- Close all other browser tabs and background applications to prevent audio conflicts
- Disable Bluetooth connections if testing built-in device speakers or a wired system
- Test in a quiet environment so subtle directional differences between channels are easy to hear
- For headphone testing, use wired over-ear headphones for the most accurate spatial audio reproduction
- Run the auto sweep at least twice — once to get familiar with the sequence, once to listen critically for any anomalies
Frequently Asked Questions
Conclusion
A surround sound test system is only as good as its calibration. The finest speakers in the world sound average when a single channel is misconfigured, a subwoofer is disconnected, or speakers are placed in the wrong positions.
This free surround sound test gives you a fast, precise way to verify every channel — in two minutes, on any device, without any technical knowledge. Run it now. Fix what needs fixing. Then sit back and hear exactly what your audio system was designed to deliver.
And if your phone or device speaker ever sounds muffled or distorted — use our speaker cleaner tool to clear water and dust in seconds.